[Map] → [Area Creation]

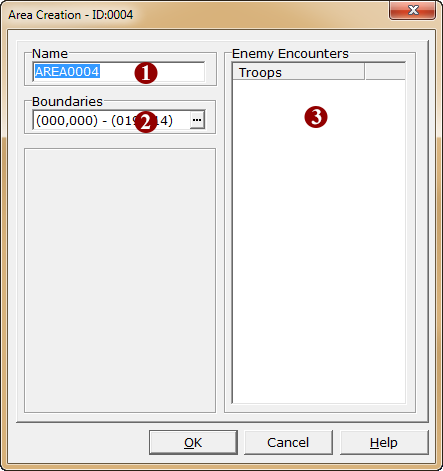
1.Name
Enter the area name within 24 characters. A descriptive name is good.
2.Boundaries
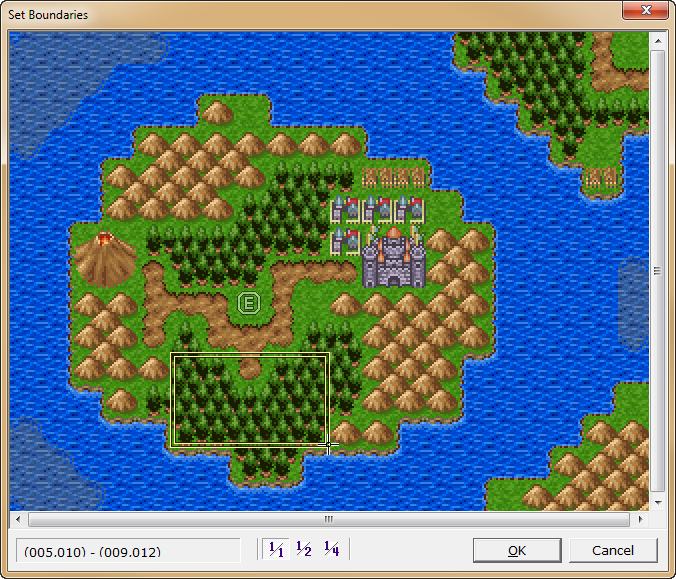
Follow these steps to specify the map boundaries for an area.
·Click the [...] button.
·On the map in the [Boundaries] window, click and drag over the part of the map to set as an area. The rectangle formed by the start and end points of the dragging motion will be will be the area boundary. If a mistake was made, dragging in another position will change its location. The [1/1] [1/2] [1/4] buttons at the bottom of the window can be used to change the zoom ratio.

·When the area boundary has been decided, click the [OK] button to close the [Set Boundaries] window.
3.Enemy Encounters
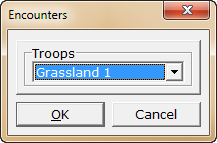
·Double-clicking on the empty space at the top of the [Enemy Encounters] list (the highlighted area) opens the [Encounters] window. Specify the names of the enemy groups to encounter from the dropdown list.
·The probability of enemy groups appearing in battle is the same for all enemy groups. If the list contains 5 items, the probability of each enemy group appearing is 20% (1/5). To increase the probability of a specific enemy group appearing, it should be added to the list multiple times. If enemy groups are additionally set for an area, the enemy groups that will appear are a combination of the map and area combined.

·The enemy encounter rate is based on the [Set Encounter Rate] set for the map that the area is in.
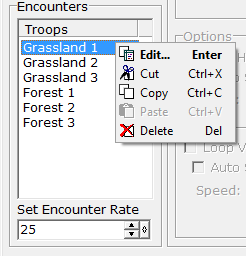
·If an option on the [Enemy Encounters] list is right-clicked, a shortcut menu will be displayed. Clicking on the menu's commands or the corresponding shortcut keys will carry out that option. The commands are as follows.

Edit |
Opens the [Encounters] window for editing enemy group settings. |
Cut |
Moves the entry onto the clipboard and deletes it from the list. |
Copy |
Places the entry onto the clipboard. |
Paste |
Inserts the entry on the clipboard at the right-clicked position. |
Delete |
Deletes the entry. |